


The first item is to familiarize yourself with the 6.0L engine. The coffee table manuals in the link below is the perfect place to start. The link below will take you to the downloads for them.
https://idspeedshop.com/id-speed-shop-news/ford-60...
This is a compilation of multiple resources online to assist in troubleshooting your truck. "Bismic"
made public posts on PowerStroke org, as well as links to multiple YouTube videos. I
downloaded a much as I could, as this information is volatile and could be removed at any time.
Now , NO-START TROUBLESHOOTING * How to implement some of what you have seen and read above:
As far as diesel technology goes, you need fuel, air, and compression (heat). In addition, the modern diesels need a number of electrical and electronic things to be satisfied before the fueling command will be given. To get fuel, you will need proper base engine oil flow and pressure and sufficient high pressure oil flow and pressure.
MAKE SURE THAT:
- YOU HAVE SUFFICIENT OIL LEVEL, not low and not overfilled. Signs of aerated oil could indicate issues that could lead to a no-start.
- YOU HAVE SUFFICIENT FUEL LEVEL AND IT DOESN'T SMELL LIKE GASOLINE (also verify at the water drain plug on the Primary fuel filter that the fuel is not contaminated or congealed).
- YOUR AIR FILTER "FILTER-MINDER" ISN'T INDICATING A RESTRICTION.
- LASTLY, REMOVE THE SECONDARY FUEL FILTER CAP AND FILTER, REMOVE THE FUEL IN THE BOWL, THEN VERIFY THAT THE BOWL FILLS WHEN THE KEY IS TURNED ON (it can fill fairly quickly, so have someone ready to turn the key on at your direction)
I ALWAYS CHARGE MY BATTERIES AND INDIVIDUALLY LOAD TEST THEM BEFORE STARTING MY TROUBLESHOOTING. GOOD VOLTAGE IS IMPORTANT TO THE ENGINE OPERATION (cranks should not result in voltage dropping much below 10.5) AND THE ENGINE WILL NOT START WITH CRANKING RPMs BELOW 150 (PC/ED says 100 rpm, but functionally it is 150).
One of the first things to do is to get a scan tool of some sort. A ScanGaugeII is a common purchase, but at $120 it is old technology and doesn't read codes very well. An Edge CTS2 is nice, but it is expensive (and may not read EBP and IAT accurately). The best value is found in a phone app - either TorquePro or ForScan Lite. ForScan Lite is a far better code reader, but I like the Torque Pro interface better. Either app is only a few dollars, but you also need to purchase an ELM327 OBDII adapter. iOS phones require a WiFi adapter ...... Bluetooth adapter for Android. I like the BAFX brand adapter. That brand seems to be very reliable.
With the a good scan tool, FIRST check for codes and use it to pull data mentioned in the text below. Remember the ScangaugeII is not a good code reader. The Torque Pro is ok, but definitely not as thorough as ForScan.
Usually, in order for the engine to start, with your scan tool, you look for (cranking values):
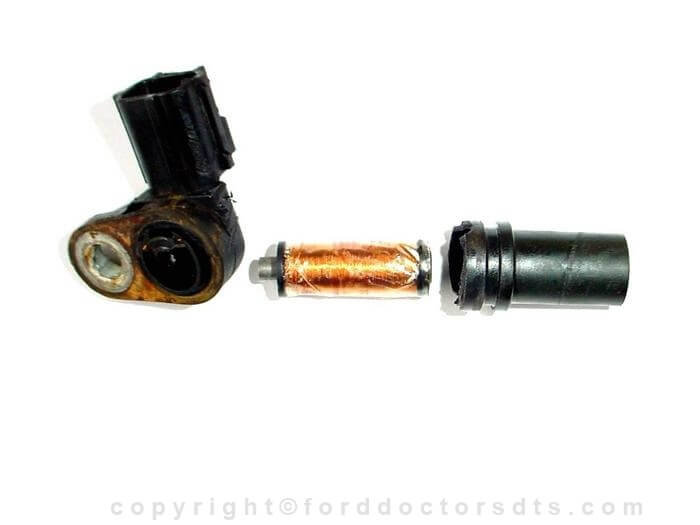
cam/crank sync (sync=1)
FICM sync (the FICM is the Fuel Injection Control Module) (sync=1)
Commanded fuel pulse width, FPW (to ensure that the fueling command is given)
ICP pressure of 500 psig minimum
Cranking speed of 150 rpm minimum (PC/ED says 100 rpm, but functionally it is 150)
Acceptable system voltage (typically over 10.5 volts)
FICM Main power (MPower) of 46-49 volts
FICM logic power (LPower) voltage of over 10.5 volts, and
v-reference voltage (5 volts +/- .5)
NOTE:
- extended cranks will be experienced below 9.5 volts, scan tools can lose connection below 9 volts, and the engine will absolutely not start below 8-8.5 volts.
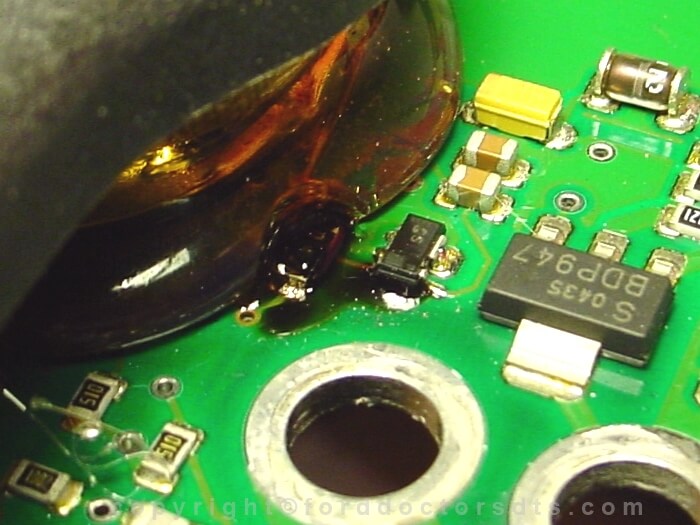
- Low system voltage can quickly lead to damage on either or both of the FICM circuit boards (Power Board and/or Logic Board)
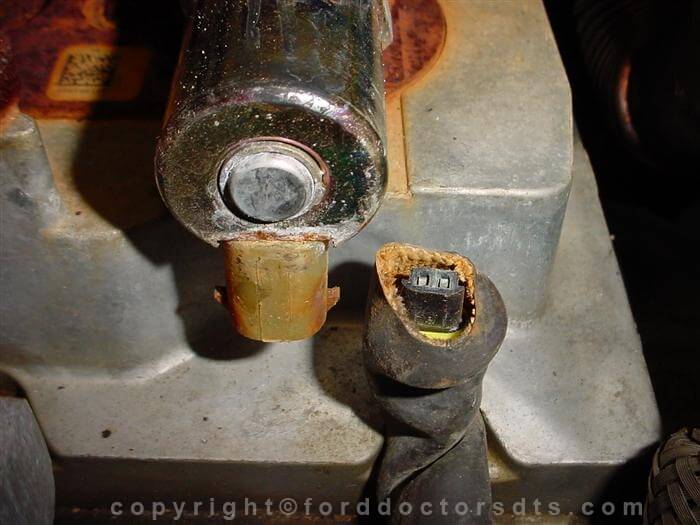
The injectors need to be working properly so that they will actuate with the electrical signal sent to them from the FICM (and they need sufficient high pressure oil pressure to actually push down the intensifier piston that pushes down the injector plunger). Some common issues with them are electrical issues at the connector, sticking spool valves (stiction), or damaged plungers.
NOTE - if you suspect an injector is dumping fuel - DO NOT DRIVE IT. It can ruin your engine. You will see a LOT of black smoke, or white smoke, that will smell like unburned fuel, and you might even hear some loud "clunking" with the engine running. You can start investigation by cranking the engine w/ the starter solenoid wire jumpered to the passenger battery positive terminal. You are listening for uneven cranks. If you have uneven cranking, you should probably consider a borescope inspection or a compression check. Codes will probably point you to the proper cylinder! There will be a video link later to show you how to crank w/ the starter solenoid wire/
REPEAT ADVICE: I ALWAYS advise people to manually charge each battery separately and also to load test them separately when beginning to troubleshoot a no-start. Low voltage can cause quite a few problems, can interfere with good data, and can actually be the cause of the no-start.
Troubleshooting a NO-START (see items 4 and 5 for a "no-crank"):
1. Pull diagnostic trouble codes (DTC's) if you can (you can have codes without a Check Engine Light). Verify that you have both cam/crank sync and FICM sync when cranking.
2. If manual, clutch pedal fully pressed?
3. Battery connections (all including grounds) - all good? Alternator cable connections good?
4. Automatic transmission shift lever fully in PARK or NEUTRAL? Try restarting while slightly moving the gearshift lever.
5. Starter relay connections - all good?
NOTE - if you are not getting any crank at all there are a few things to try:
- Check fuse F2.22 (20A Engine Controls) under the dash. If it is blown a few common causes are: shorted fan clutch, MAF, IPR, EGR actuator, or GPCM.
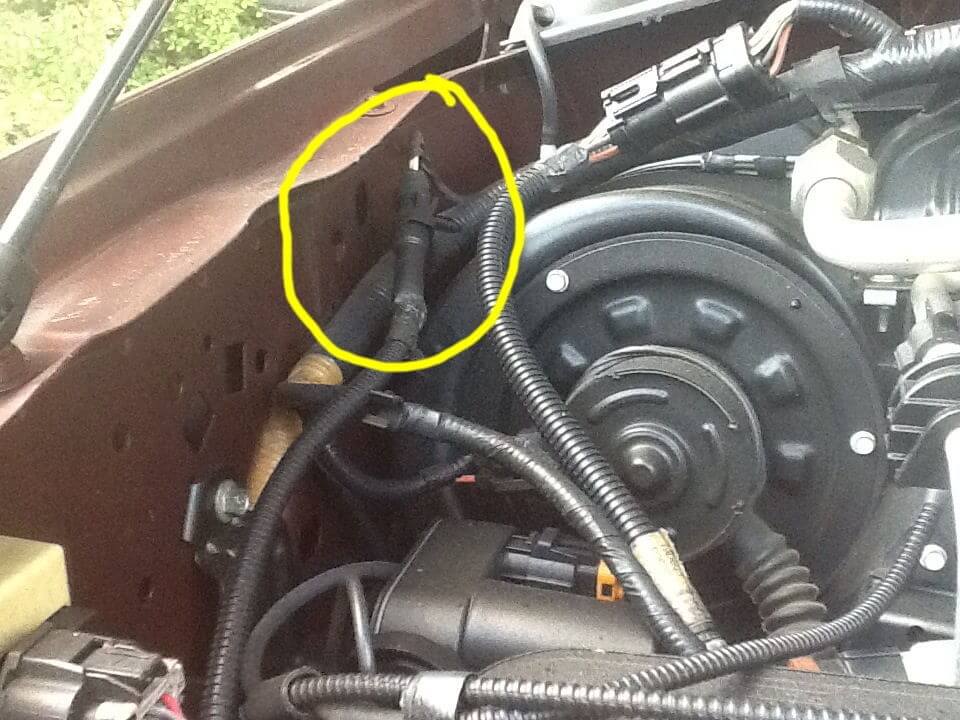
- Under the hood, find the yellow with light blue striped colored wire adjacent to the passenger side battery in the engine compartment, near the vacuum pump that has a "squeeze-and-pull" type connection. Disconnect it, and jump the male end of the connector to the passenger side battery positive terminal. The starter should crank. Leave the key in the off position to just crank. If the starter does not engage with this test, it is a starter or wiring problem!

- Inspect the fan clutch wiring
- Try cranking with the middle PCM plug pulled out (C1381c)
- Look at the fuel cut-off inertia switch
- Watch the v-reference voltage when attempting a crank - it should be at (or very close to) 5 volts
- If v-reference voltage looks off, try starting w/ the various v-reference sensors disconnected: Fan speed sensor (fan clutch wiring), EGR valve, ICP, EBP, MAP, BARO, APP, TPS, EOT, ECT, IAT1, IAT2, TFT, WIF sensor. Even the Instrument Cluster (IC or HEC) is fed the 5 volt reference and could be an issue.
- Ultimately a transmission range sensor could be the issue as well. This sensor is inside the transmission.
Changing out your Transmission Range Sensor (TRS) - part # 7C3Z-7H557-A:
6. Glow plug connectors making good connection? No check engine light (CEL). Glow plugs are usually good at throwing a code and setting the CEL.
7. Is the starter engaging? Verify starter and ignition switch are working properly.
8. Load test BOTH batteries individually and check the charging system (alternator). PCM needs to see 100 rpm minimum to start, but functionally it needs to be at 150 rpm minimum.
9. Fusible links and fuses OK? The FICM relay is labeled IDM Relay #304. Check it specifically.
10. Could a factory or aftermarket anti-theft device be causing the problem (Passive Active Theft System - PATS)? Disconnect it if possible. Same w/ a remote start system.
11. Push the reset on the emergency fuel cut-off switch.
12. Any oil pressure registering on the dash pressure gauge (low pressure system)? If not, it could be a bad oil pump (LPOP), a oil filter drain valve stuck open, or a bad oil pressure regulator. You should register oil pressure on the dash gauge in a long crank/ no start condition when the complete oil system is known to be sealed.
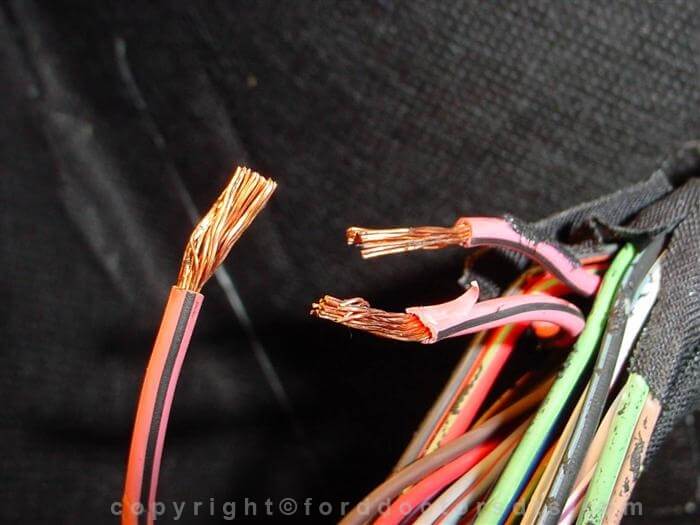
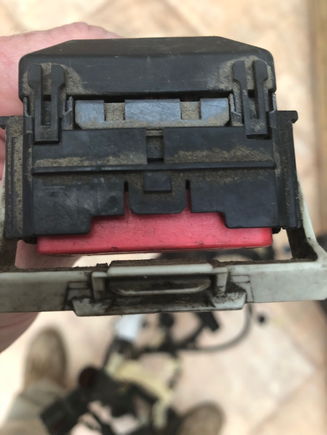
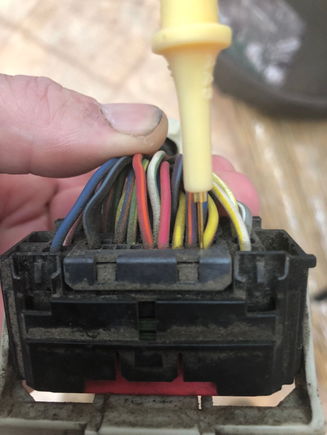
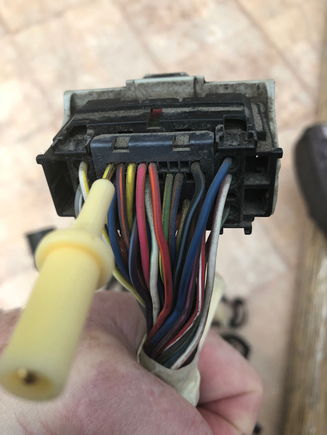
13. Check PCM and FICM connections - any wire chaffing? Any Injector harness chaffing? Any ICP or IPR harness chaffing? More detail below.
14. Verify that the oil level is correct and the proper oil and filter have been installed. Oil foaming and loss of viscosity (too thick or fuel diluted) can be an issue. Check oil level for fuel dilution, inspect oil condition, maybe even change oil and filter. Definitely make sure you filled w/ the proper oil. Fuel dilution from a leaky injector will show up as an overfull oil level, so low oil level AND high oil level can contribute to a no-start! MAKE SURE THAT YOU ARE USING AN OEM OIL FILTER CAP AND AN OEM OIL FILTER. The tall aftermarket oil filter cap (when used with a short OEM type filter) will not depress (close) the oil filter housing drain valve. IT WILL CAUSE A NO-START!
15. Verify that the air filter is not plugged - Check the filter minder and you may even want to pull the air filter and inspect.
16. Inspect the ICP sensor and harness. Is it oil soaked? Disconnect the ICP and try again (the engine will start with it disconnected if a bad ICP sensor is causing the no-start). The PCM will establish a default control scheme that would allow the truck to start if the problem were the ICP sensor. Afterwards, make sure the harness is re-installed securely. Also, check ICP circuit fuse. Just be aware that trying to start w/ the ICP unplugged will throw a code that some might confuse with an actual BAD ICP sensor.
17. Change both fuel filters, inspect appearance of the fuel when draining the water separator (you could just have bad fuel). While the secondary fuel filter is out, verify that the fuel pump will quickly fill the secondary fuel filter bowl with the key on. If so, replace the filter, re-install the cap, and make sure that the air is purged on start-up (follow the proper KOEO cycling procedure before cranking).
18. If you can, verify the fuel pressure (test port is at the base of the secondary fuel filter). Must be over 45 psig (I MUCH prefer 50 psig as the minimum)!
19. If you have no fuel flow or low pressure, it could be a bad pump (HFCM), OR it could be a plugged fuel filter or plugged lines. You can blow air through the lines to check for plugging. If there is no plugging, test the pump. First, pull fuse 302 (PCM) and relay 304 (FICM) and then pull the secondary (upper) fuel filter, remove any fuel, and then verify that it is being filled by cranking the engine. As it is being filled, make sure there are no air bubbles. If there are, you have a leak in some connections, the HFCM suction line, or the HFCM o-ring (most likely). Be sure to lube the o-ring w/ oil before re-installing.
TO CHECK FOR SUCTION LINE PLUGGING:
The pump vacuum test is referred to as an ""inlet restriction test"". This will test from the pump to the tank for a restriction. A reading that of more than 6"" H2O vacuum is very bad. 6"" is the max limit. The normal reading is between 2"" and 0"" of H2O.
To do this test you would need to ""T"" a vacuum gauge in between the back of the pump and the line coming into it. If you have a high reading there, then move the T to the tank at the outlet line. If the restriction is still present at the tank, then the problem is in the tank. If there is no restriction at this point, then the issue would be with the supply line to the pump."
20. Pull the oil filter top and crank it while you watch to see if any oil is flowing into the filter housing. If not then it is a LPO problem. Take a long extension and hold down the drain valve at the bottom of the oil filter housing (round black thing held up by a spring). Crank the engine. The housing should fill within about 3-4 seconds. Without the drain valve depressed, the bowl should fill in 8-10 seconds of cranking. NOTE - it is best to crank w/ the starter solenoid wire jumpered to the passenger battery positive terminal. Ask about this if you do not know how to do it! If the oil filter housing doesn't fill, check the low pressure oil pressure regulator (12mm allen socket):
21. If possible, verify high pressure oil pressure (ICP sensor) - must be over 500 psig to fire the injectors. See link below.
22. Pull the EGR valve and inspect. Clean if dirty. Check the strength of the spring. Consider replacing it - just because. Also clean the MAP sensor hose and the EBP tube. These may cause surging and hard start, but a long shot for a no-start.
23. Remember - If the oil temp is reporting over 131 *F, the glow plugs will not be turned on, and the black connector is for the EVEN number GP's and the green is for the ODD GP's.
Glow Plug itself:
The glow plug wire harnesses have quick disconnects at top side of valve covers and you could disconnect them and conduct ohm readings of each individual glow plug, as well as test for any open circuits. The resistance in each glow plug - should be less than 1 ohm.
Checking current draw w/ Inductive ammeter:
Troubleshoot the glow plug system (you need a clamp on inductive ammeter for this method). Test each glow plug module wire bundle separately, then test each glow plug. Look for any amperages lower on one side or lower to an individual glow plug. From each module you should see 200 A at first dropping quickly to 35-37 A if the GPCM is OK. Both modules should read apprx. the same. Each glow plug will draw 8-10 A. Also, to check the harness, disconnect the four wire connector (the one with the red lock tab). Using an ohm meter set to OHMs (preferably one that auto ranges), connect the red lead to each of the four female cavities with the black lead connected to your driver side battery ground terminal. Each of the four terminals should give you between 0.5 and 2 ohms readings.
PCM to GPCM:
You can also check for input, continuity and any shorts between the 2 input feeds from the PCM to the GPCM 'green' connector: The PCM provides input to GPCM thru PCM pin#'s 3(GPE) and 17(GPD) of the PCM J1-C2 connector to the GPCM 'green' connector pin#'s 8 and 9. So, to recap:
PCM #3 goes to GPCM green #8 and PCM #17 goes to GPCM green connector #9.
GPCM to Glow plugs:
Both plugs on the Glow Plug Control Module have leads that supply the amps/power to all the glow plugs (pin #'s 1,2,6 & 7 of both GPCM connectors feed to each bank of GP's). Both GPCM plugs have a #10 black wire with orange strip/tracer. These are the main 'power' wires coming from the passenger battery. They actually tie together with "fuseable links" to a #6 red battery cable to the passenger battery. You can clamp your amp meter over the red cable and see the total amp draw going to the GPCM with KOEO. You can also verify the GPCM is receiving B+ voltage at pin #9 (small dia. solid red color lead) of black connector on GPCM. It should have B+ voltage with KOEO(Key On Engine Off).
24. Carry out the KOEO Injector Electrical Self-Test (Click Test) and the bubble test.
25. Check the Crank (CKP) and Cam (CMP) sensor wiring harnesses.
26. Check the FICM voltage - MPower, LPower, VPower with your scan tool (see post #27 below).
Wire Chaffing Locations:
h t t p s://www.thedieselgarage.com/threads/ford-dtc-codes-wire-chafing-locations.58336/
note - remove the spaces between the "h t t p s" and insert "the diesel garage" (without any spaces) in place of the asterisks (no quotation marks)
 |  |
 |  |
ONE OF THE MOST COMMON CAUSES OF A 6.0L "NO-START WHEN HOT" IS A LEAK IN THE HIGH PRESSURE OIL SYSTEM. THE BEST WAY TO IDENTIFY THIS IS TO POST THE CRANKING ICP SENSOR PRESSURE, THE ICP VOLTAGE, AND THE IPR % DUTY CYCLE. IT IS BEST TO RETRIEVE THIS DATA WHEN YOU ARE GETTING THE NO-START (ie when hot). MORE ON THIS BELOW. A BAD HPOP can also cause this, but the 03, 04, and 04.5 HPOPs are the most common ones to have issues. The 05 and up HPOP's do not fail nearly as often. Unfortunately the "wavy high pressure oil rails" came out in 04.5. For 04.6 model year and up, the dummy plugs and standpipes are prone to leakage. The HPOP discharge fitting was changed in 05 (along w/ the style of HPOP). THE HPOP was a BIG improvement, but the discharge "STC fitting" is a common source of leaks in the 05 and up high pressure oil system.
TROUBLESHOOT THE HPO PRESSURE SYSTEM:
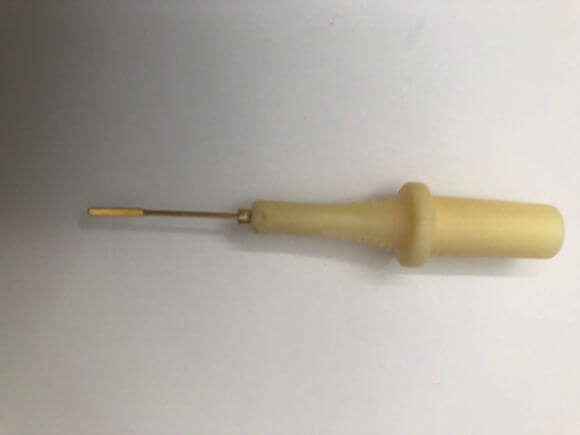
If you're troubleshooting at home and don't have a gauge or adapter, strip back the wires about an inch away from the icp sensor connector. Obtain a digital multimeter and set it for voltage (DC). The bn-wh wire is a five volt reference, leave that alone. Strip back the db-lg signal wire and the gy-rd ground wire. Put positive lead on a dark blue-light green wire and negative lead on gray-red wire. Have an assistant crank truck, you need a minimum of 0.80 volts (500 psi) for the truck to start, if you are getting greater than that then you have sufficient high pressure oil.
IPR valve removal socket:
Amazon.com: Injector Pressure Regulator Valve Socket Removal Tool and Seal Kit 6.0 IPR Valve Socket with Seal Kit Compatible with 2003-2010 Ford 6.0L Powerstroke Excursion F250 F350 F450 F550 E350 E450: Automotive
If possible, you can pull the ICP and install a pressure gauge to check the pressure in the “high pressure oil system”. Crank the engine and watch the pressure. You need 500 psig to start. The fitting needed for this is the same as that for the fuel pressure test port. IMO, a better way to air test is to remove the IPR valve and air test from the IPR opening. This takes the IPR out of the leak testing equation. You can test the IPR valve itself at a later time. Tool to air test from the IPR valve opening:
Amazon.com: JGR 1 PC 6.0L Powerstroke Diesel High Pressure Oil Pump IPR Valve Air Test Fitting Tool for Ford: Automotive
Here is another way of checking to see if you have sufficient high pressure oil without having a gauge or adapter. Strip back the wires about an inch away from the icp sensor connector. Obtain a digital multimeter and set it for voltage (DC). The bn-wh wire is a five volt reference, leave that alone. Strip back the db-lg signal wire and the gy-rd ground wire. Put positive lead on a dark blue-light green wire and negative lead on gray-red wire. Have an assistant crank truck, you need a minimum of 0.80 volts (500 psi) for the truck to start, if you are getting greater than that then you have sufficient high pressure oil.
When you can't develop the needed high pressure oil pressure (assuming your ICP sensor is reading accurately), your issue is ALWAYS ONE of the following:
1. a leak
2. a bad IPR (plugged, not working mechanically not working electrically)
3. A bad HPOP
4. low base oil pressure
To determine if your ICP sensor is accurate, check sensor voltage against sensor psig output:
https://www.ford-trucks.com/forums/attachment.php?attachmentid=175476&d=1487992315
Early ICP sensor shows apprx 0.2v at KOEO with correct/working sensor. 0.16v to .24v is acceptable
Late ICP sensor shows apprx 0.25v at KOEO with correct/working sensor. 0.24v to .28v is acceptable

When you pressure test with air, you HAVE TO wait long enough to push the oil out of the system. This is because you want air to contact all potential leak points (it will flow out of a leaking seal a LOT easier than oil). Of course hot oil will flow better than cold oil. It is ALWAYS better to do the leak testing when the system is hot.
Three videos on air testing your High Pressure Oil System (using various oil rail fittings to introduce the air).
To check your ipr and hp oil system:
1. Determine which way you are going to close your IPR valve. There are 4 ways.
- OTC 6764 Ford Diesel 6.0L IPR Controller / Tester (you can get one on Amazon)
- you can use an old IPR connector (part # 6E7Z-12A690-DA) from an old harness wired to a cigar lighter plug. Try asking a tech at your local ford dealer, maybe one will be nice enough to snip one off a harness that's laying around. Red wire switched power Pin 1 B+; Yellow/red PCM supplied ground Pin 2 B-.
- Without a scan tool to take active command of IPR duty to 100%, you can do it by having the key in the RUN position, and jumping (to ground) pin #2 of C1381c (the middle of the three PCM connectors between the driver side battery and the inner driver side fender well which requires the battery cover removed to access unless it's MIA) which will be a yellow wire with red stripe. This is the ground side wire to the IPR.
|
|
|
|
- Use a diagnostic tool. I believe that ForScan on a laptop will command the IPR closed. So will AutoEnginuity. Of course the Ford IDS system will command it closed.
2. Then remove your icp sensor (04.5 and up truck it is on the passenger side valve cover) and thread a fitting in with an air fitting on the end (so you can apply compressed air to the hp oil system). You can also use a tool (link below) to air test from the IPR valve opening (IMO this is the best way). In the video above, it talks about using various oil rail fittings to introduce the air when looking for injector leaks.
Amazon.com: JGR 1 PC 6.0L Powerstroke Diesel High Pressure Oil Pump IPR Valve Air Test Fitting Tool for Ford: Automotive
3. Remove your oil fill cap, your intake up to the turbo (get the CCV out of the valve cover at least), and the hot side CAC tube.
4. Then, command the IPR closed for 1 minute or so, apply 100 psi air (150 psi is better) to the hp oil system and listed to where the leak is coming from. Close the IPR for a MAX of 2 minutes at a time, then let the IPR electronics cool a little and you can close it again. Obviously if you are introducing the air via the IPR opening fitting, you don't have to command it closed.
When you hear it you've found your problem....that is assuming you have a hp oil problem.
If your building low and high oil pressure fine, then you've just wasted your time.
Generally on no-start conditions that are related to "high pressure oil" leaks, the vehicle will still develop low pressure system pressures. However, the plug on the H.P. oil feed can occasionally blow out, the H.P. pump seal can blow out, and on the '03-04 trucks the ball on the side of the H.P. pump blow out - causing loss of base oil pressure.
Hard start - no start conditions related to the HPOP could be attributed to the following components in the high pressure oil system (air test while hot will determine the root cause):
h t t p://www.***.com/forum/showthread.php?t=11583
(leave the spaces out of http and where the asterisks are insert the word "ford truck fanatics" with no spaces and no quotation marks)
Faulty IPR valve
Leaking snap-to-connect (STC) fitting (05 and up model years)
Leaky or cracked branch tube
Leak with the stand pipe
Leaky or cracked oil rail (including oil rail end caps/plugs)
Leak in the d-rings of the oil rail front port plugs (or dummy plugs)
Leaky o-ring on an injector; or leak at the top of the injector where the ball tube from the high pressure oil rail connects to the injector.
Weak or failed HPOP itself
Low base oil pressure (failed oil pressure regulator).
Low base oil pressure (bad low pressure oil pump - LPOP).
Post #4 below has a low pressure oil test procedure
One easy check for injector problems: SEE POST #5 below
"When injectors fail, it is possible for combustion gasses to flow into the fuel system and displace the fuel. The gasses come through the pintle seat and into the fuel gallery in the head and up into the fuel filter.
LASTLY - Troubleshooting a NO SYNC issue (no-start, hard-start, engine-stall):
NO-CRANK TROUBLESHOOTING:
Confirm that the person with the no-crank issue actually means that there is ZERO engine rotation from the starter.
THEN ask about aftermarket security systems or remote starts (even PATS can cause an issue)
Then ask if the DLC (Data Link Connector) has power
Then ask if all other dash electronics work (ie dash lights, windows, horn, headlights, etc)
THEN confirm that it isn't a hydrolock of some sort
If all the above confirm that the issue is in fact a no-crank/no-start, then follow the procedure below:
First, ensure is that the batteries are healthy and fully charged. This means that the battery cables are clean and solid.
The second thing to verify is that the power cable to the starter is in good condition with a solid connection and no terminal corrosion.
The third thing is to check that the main passenger side battery ground is solid at the engine block by the harmonic balancer.
Next, try "jumpering" the wire to the starter solenoid (yellow with light blue stripe) to the passenger side battery - it is on the passenger fender near the vacuum pump ..... you can unplug it and get it to reach the positive battery terminal of the passenger battery and try to crank the engine that way. Do this with the key in the "off" position as a first test (the engine MIGHT start unexpectedly if the key is in the "run" position.
THOROUGHLY check all of the involved fuses and relays (sometimes it is easier to just swap in a new fuse since some fuse issues are not always clearly obvious):
For 2005 and up, No-Crank and No-Start, Check (under dash) - see below link for Junction Box picture (corrections for 2003 and 2004 are made in the text):
Fuse 22 (20A Engine Controls)
Fuse 27 (15A ignition switch run feed)
Fuse 31 (15A starter relay fuse, for 03 and 04 it is the clutch interlock switch/transmission range sensor)
Fuse 45 (10A Ignition ON switch - run/start feed)
Fuse 110 (30A ignition switch)
Fuse 113 (30A starter) - this fuse can blow if the starter is bad
Fuse 116 (30A ignition switch)
Relay 302 (PCM)
Relay 307 (Starter), Also check the stater relay pins listed below:
- Pin 30 for 12v power (at all times) and pin 85 (switched power).
- If pin 30 doesn't have power, then fuse F2.113 is blown
- If pin 85 doesn't have switched power, then fuse F2.31 is blown
Also, check to see if the PCM is supplying a ground to the starter relay with the key in the "START" (or crank) position and the fuel pump with the key in the "ON" position:
The PCM controls the ground for the starter relay (contact 86 on relay 307) that is on the fuse panel under the dash (CJB); or on connector C270f that connects to the CJB. This "switched ground" is a pink wire (for the 05 and up year models) or a Brown with pink stripe for the 03-04 years. It is pin #4 on the PCM left connector (C1381a), if you need to locate it. You can jumper that pin to ground (leaving all the connectors plugged in) and see if the starter will crank the engine, or if the engine will start.
If the PCM doesn't sense neutral or park from the TRS (Transmission Range Sensor), it will not ground the starter relay. So, if you have power on two posts at the relay, but no ground ... it is either a PCM issue , the wiring (pink wire circuit), the TRS (or its circuitry), or you have multiple things going on. You can turn the key to "on", apply the brake, and check to see if the reversing lamp comes on when moving the gear shift to reverse (ie it is an indication that the range sensor is probably working).
If you have an issue with the Transmission Range Sensor (which can also cause a no-crank), the fuel pump will still run with only this sensor being bad.
Will the vehicle crank with the key, if you disconnect the middle of the three PCM connectors (C1381c)?
If it does, then you most likely have a short in a v-reference sensor.
A bad fan clutch or shorted wiring to the fan clutch will keep it from cranking (and it may prevent the fuel pump from running):
- Check fuse F2.22 (CJB - under the drivers side dash)
- Unplug the fan clutch and see if it'll crank
- Unplug the middle PCM connector (C1381c) and see if it will crank
A bad fan clutch, or shorted out wiring to the fan clutch, can pull down PCM voltage (it can also impact the 12V buffered power that feeds the Transmission Range Sensor) so that commands won't be sent to close the starter OR the fuel pump relays. These fan clutch electrical issues also tend to blow fuse F2.22. Lastly, any sensor with a shorted out v-reference circuit, MIGHT also cause a no-crank along with the fuel pump not running. This is why the test to try cranking w/ the middle PCM plug pulled out.
The buffered power voltage can be checked at in fan clutch connector at pin #6 (Brown with Light Green stripe wire), and at PCM connector 1381a at pin #46 (same color wire).
The switched power voltage can be checked at in fan clutch connector at pin #5 (Red wire), and at PCM connector 1381c at pin #46 (Red wire).
Two last "odd" no cranks:
Pop the cover off under your steering wheel, unscrew the ignition "slider" and test it to see if it is a problem with the linkage from your key switch or the ignition itself. If I remember it is a t-25 torx bit, the ignition slider is a white box. If you unbolt the box you will see a round bar that you can slide up and down in a slot. Slide it forward one "click", this is like the first click when you turn your ignition key. Wait for your glow plug light to turn off and push it the rest of the way down and hold it down until the truck starts. let go when it starts. If that works then you have some mechanical linkage problem in the steering column itself and the electronics are fine.
The battery saver circuit can cause a no-crank. It contains a voltage regulator and a capacitor, and a pcb style relay used to time the delay. These components are in the Instrument Cluster (HEC). If the battery saver circuit is bad, it can cause a total loss of electricity by dragging down the system voltage (audio, power windows, HEC illumination, even lights, horn, ignition, dash, fuel pump, starter, etc). Just turn on the head lights for a few seconds and hopefully all will be well (for a good/long length of time). It is also possible that relay 306 (Accessory Delay relay) in the CJB is acting up.
Data checklist during startup:
FICM_L: should read 11.0 to 12.0 volts at key-on/engine-off and remain steady while you
crank the engine.
FICM_M: should read 47.5 to 48.0 volts at key-on/engine-off and remain steady while you
crank the engine.
FICM_V: should read 11.0 to 12.0 volts at key-on/engine-off and remain steady while you
crank the engine.
ICP V: should read 0.18 to 0.25 volts at key-on/engine-off and climb to minimum 0.8 volts
while you crank the engine.
ICP: should read 0 psi at key-on/engine-off and climb to minimum 500 psi while you crank
the engine over.
IPR Duty Cycle: should read 14.84% at key-on/engine-off and climb to around 50% as you
crank the engine over.
FICM_SYNC: should read "NO" at key-on/engine-off and change to "YES" when you crank
the engine over.
SYNC: should read "NO" at key-on/engine-off and change to "YES" when you crank the
engine over.
V_PWR: should indicate around 12 volts at key-on/engine-off and drop to no lower than 9.5
volts while cranking the engine over.
RPM: should indicate around 175 to 200 as you crank the engine over. Any slower, and it's
not cranking fast enough.
Fuel pressure spec is 56 psi, and no lower than 45 psi under load. This can be measured
by connecting a fuel pressure gauge to the secondary fuel filter housing port that requires
a 6mm allen key to remove.