


We've compiled installation pictures we found online, along with some of our own. Hopefully having this resource in one place will assist DIY customers or shops that haven't installed a pulley on a Hellcat before.

Installing a Supercharger Pulley on your Hellcat is about a 3-hour job. The
Supercharger can either be tilted up and secured or completely removed to access and
remove the supercharger snout. We will show pictures of both ways.
1. Start by disconnecting the battery in the trunk or under the passenger seat in the TH.
2. Remove wiper cowl bracket. Simply pop off covers, unscrew the bolts, lift hinge @ 90
degrees, and pull it off.
3. Start unplugging everything attached to the supercharger. there are 2 in te rear as
well Also disconnect inter cooler lines on passenger side. If you aren't pulling the
supercharger completely, you do not need to touch the injector pigtails, supercharger
coolant lines, or fuel rails.
4. Remove the air intake tube from the Throttle Body. You can leave Throttle Body
connected to supercharger snout.
5. If pulling the supercharger, remove all of the supercharger torx bolts and all 10mm
intake bolts.
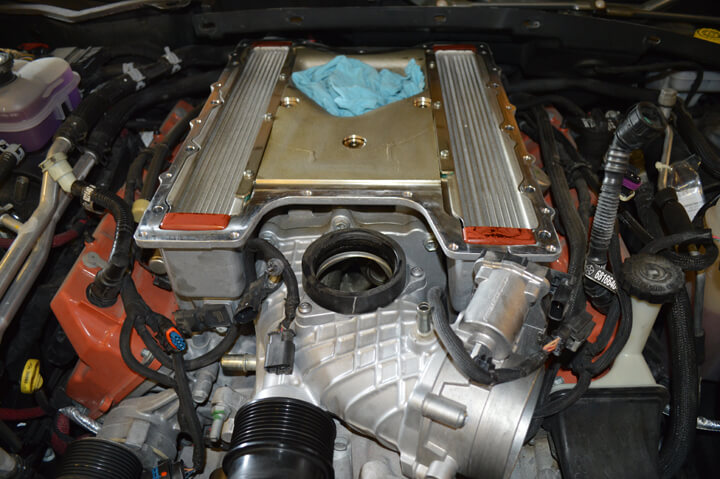
If you will just be removing the lid to tilt the supercharger, leave bypass valve on lid,
slowly & slightly lift lid .5” from middle front, un-stick sc lid gasket slowly and gently all
around with flat screwdriver or the like. Once free, carefully remove gasket entirely
(inspect , place aside on clean surface), lift off lid entirely (bypass valve will wiggle rest
of the way out of the rubber grommet, retain the 6 x 1.5” long -thin green rubber
gaskets, 3 on each side on underside of lid -they seal some intercooler gaps- push them
back into their slot on SC lid), (cover/block the exposed rotor air outlet so nothing falls
down in there)
*If you damaged some gaskets here is the gasket assembly kit you'll need to order:
68267539AA
6. Remove belt and disconnect Injector pigtails
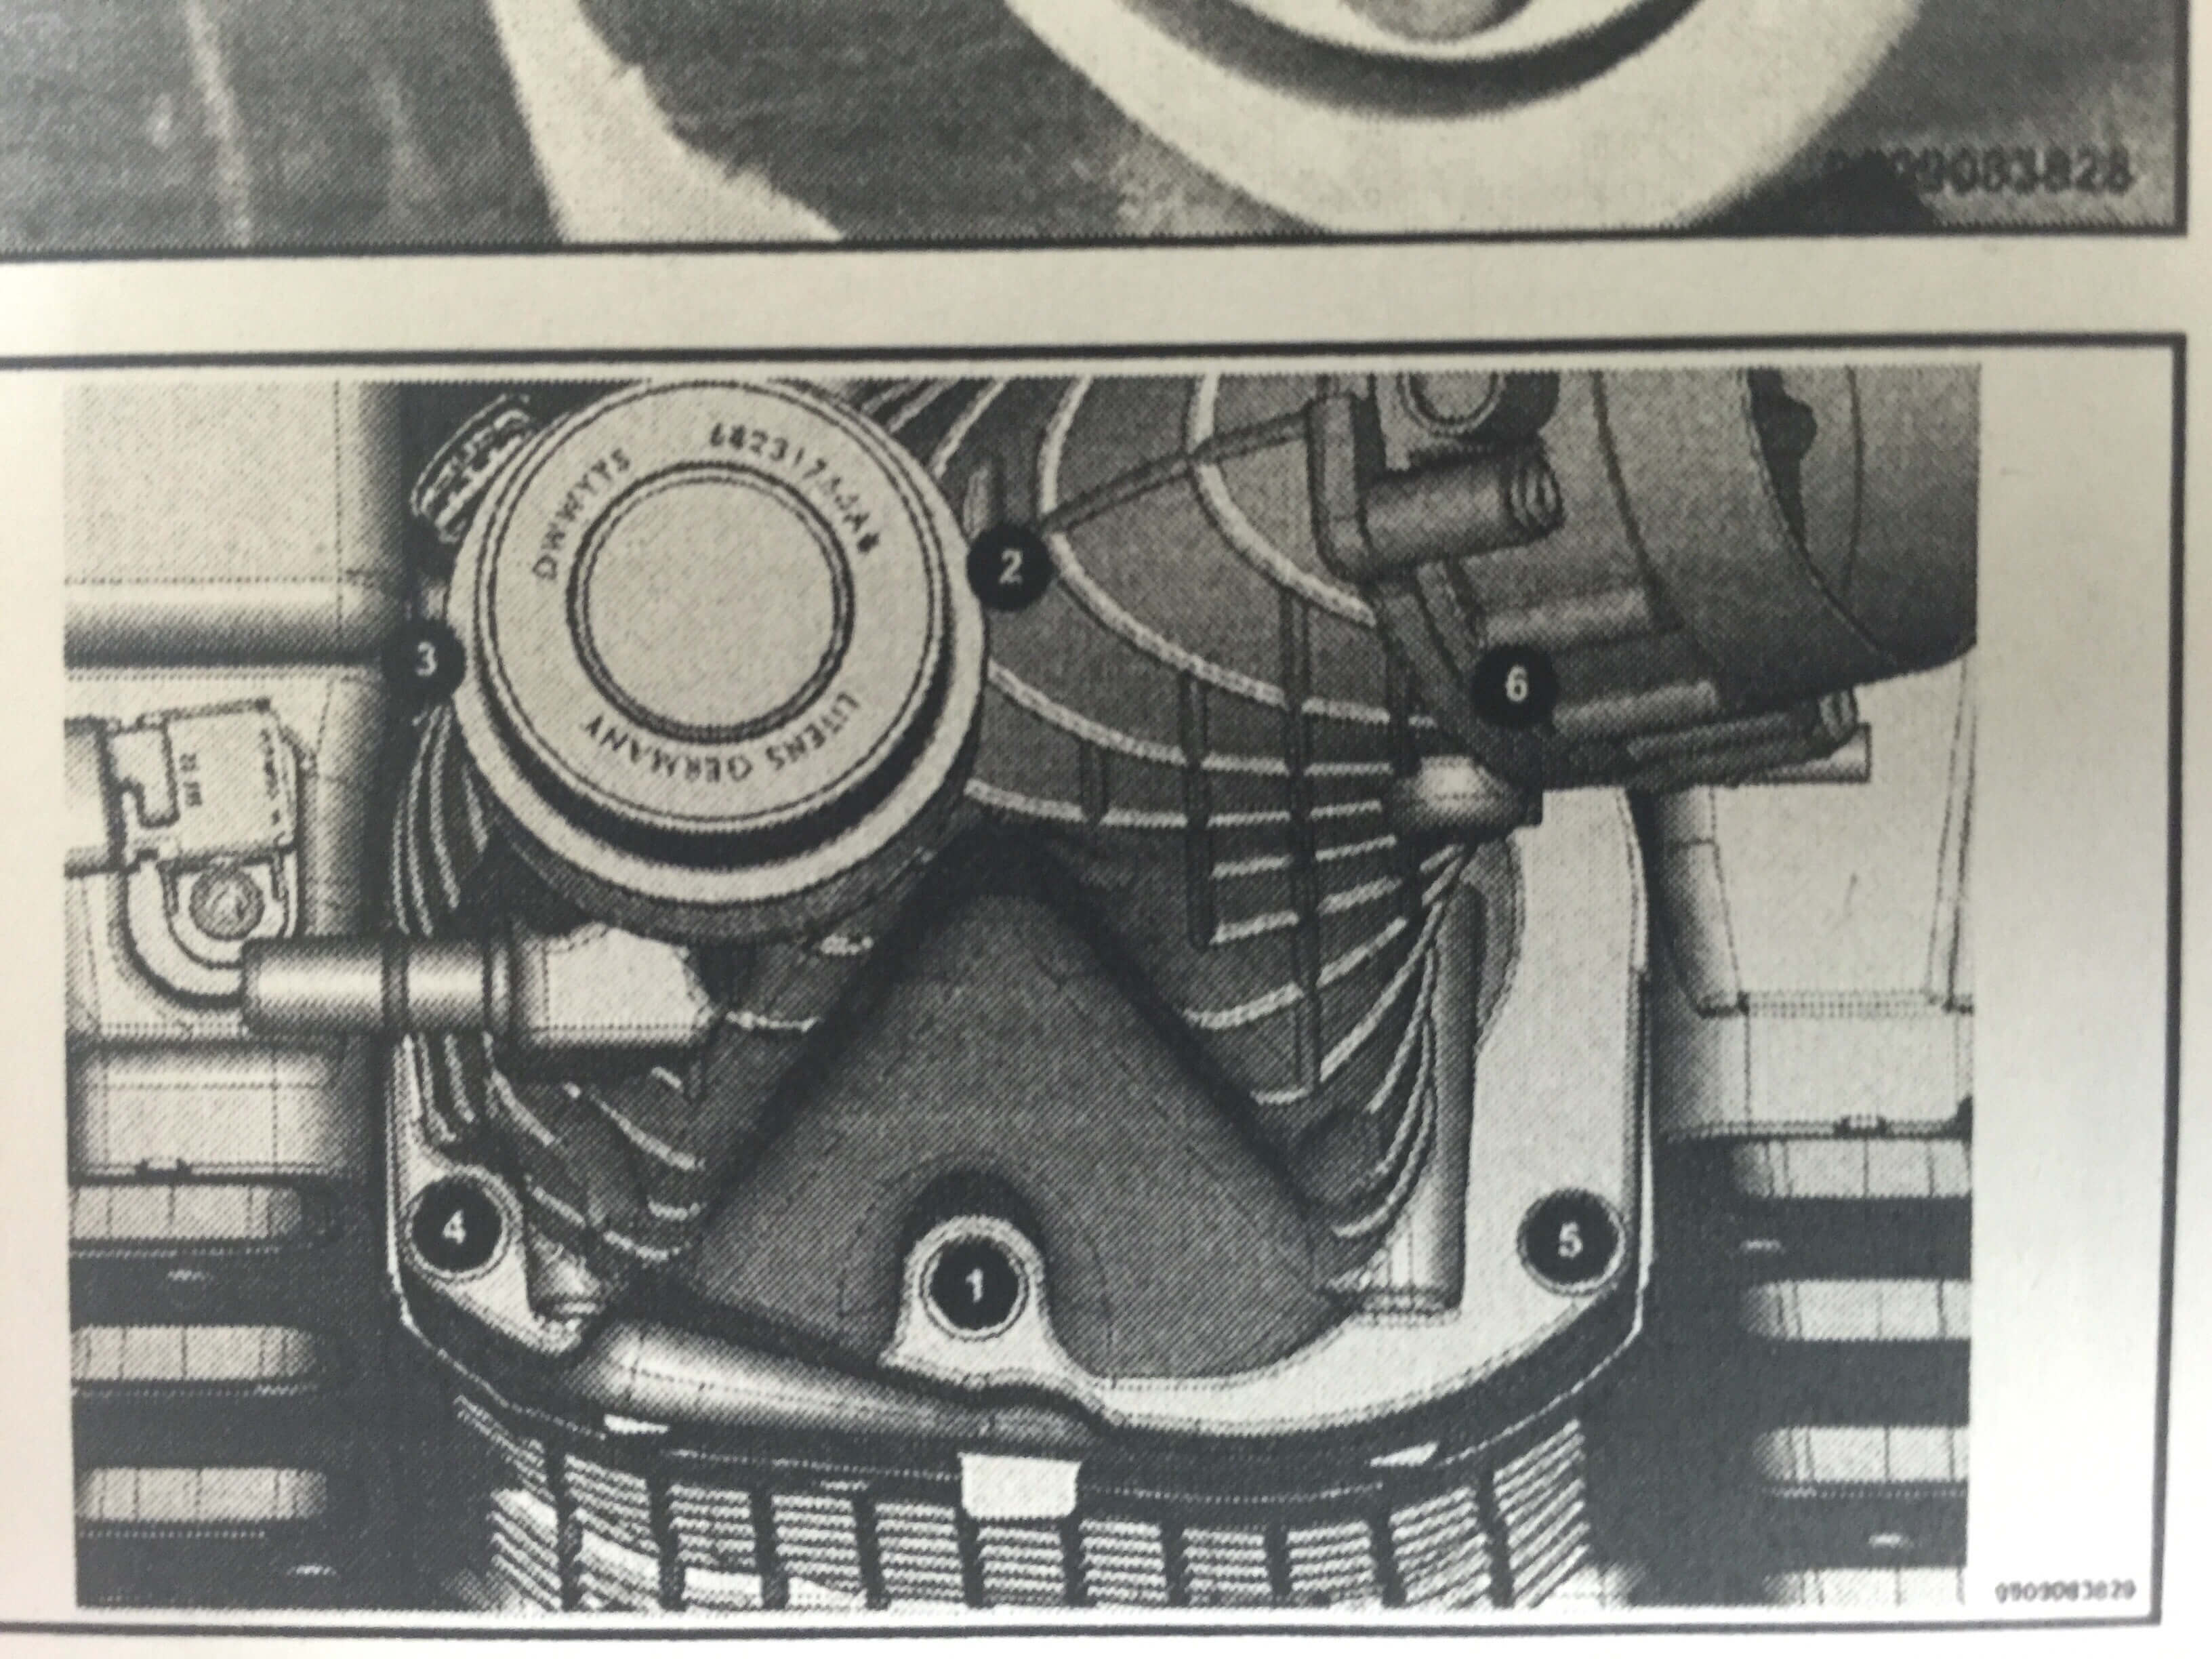
7. Remove bypass valve grommet bracket. There are 3 bolts.
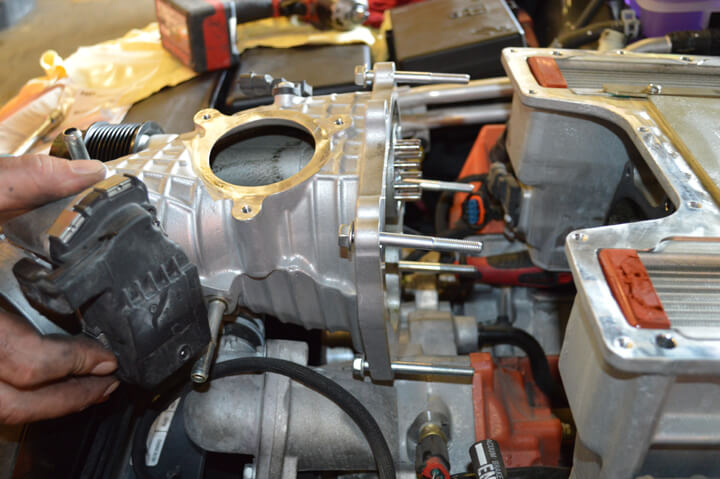
9. If you're pulling the supercharger completely, you'll do this now. If not, lift front front of
supercharger up with crowbar or beaker bar zip tied around pulley. Lift it about 1.5”.
Prop each side with something like a small piece of 2x4, rubber, plastic, etc. Keep an
eye on the steel gasket, as it can lift with the Supercharger.
10. Remove all 3 torx bolts to rubber grommet on snout, which will give you access to
(6) 13mm snout bolts. After that, it pulls right off.
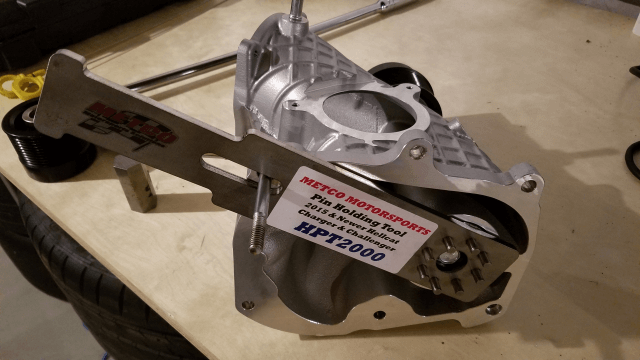
11. Remove pulley with hex tool purchased with the pulley. Use a minimum 3/4” drive
socket wrench with breaker bar, if needed, DO NOT USE IMPACT GUN.
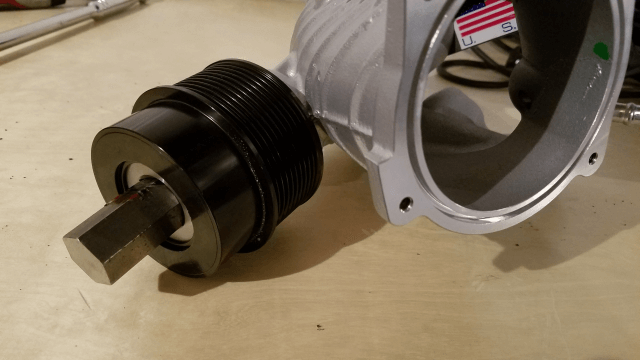
12. Screw on the new pulley with the Locktight provided. Torque to 50-70ft.lbs. Again,
DO NOT USE IMPACT GUN.
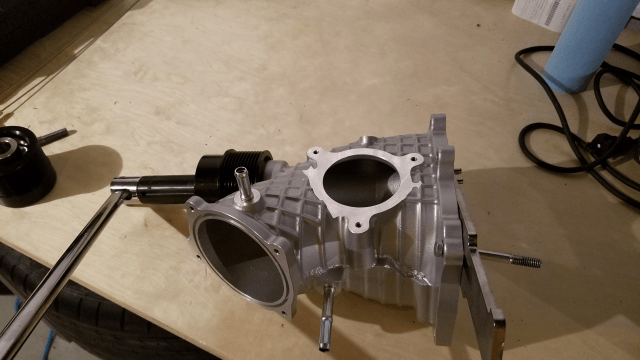
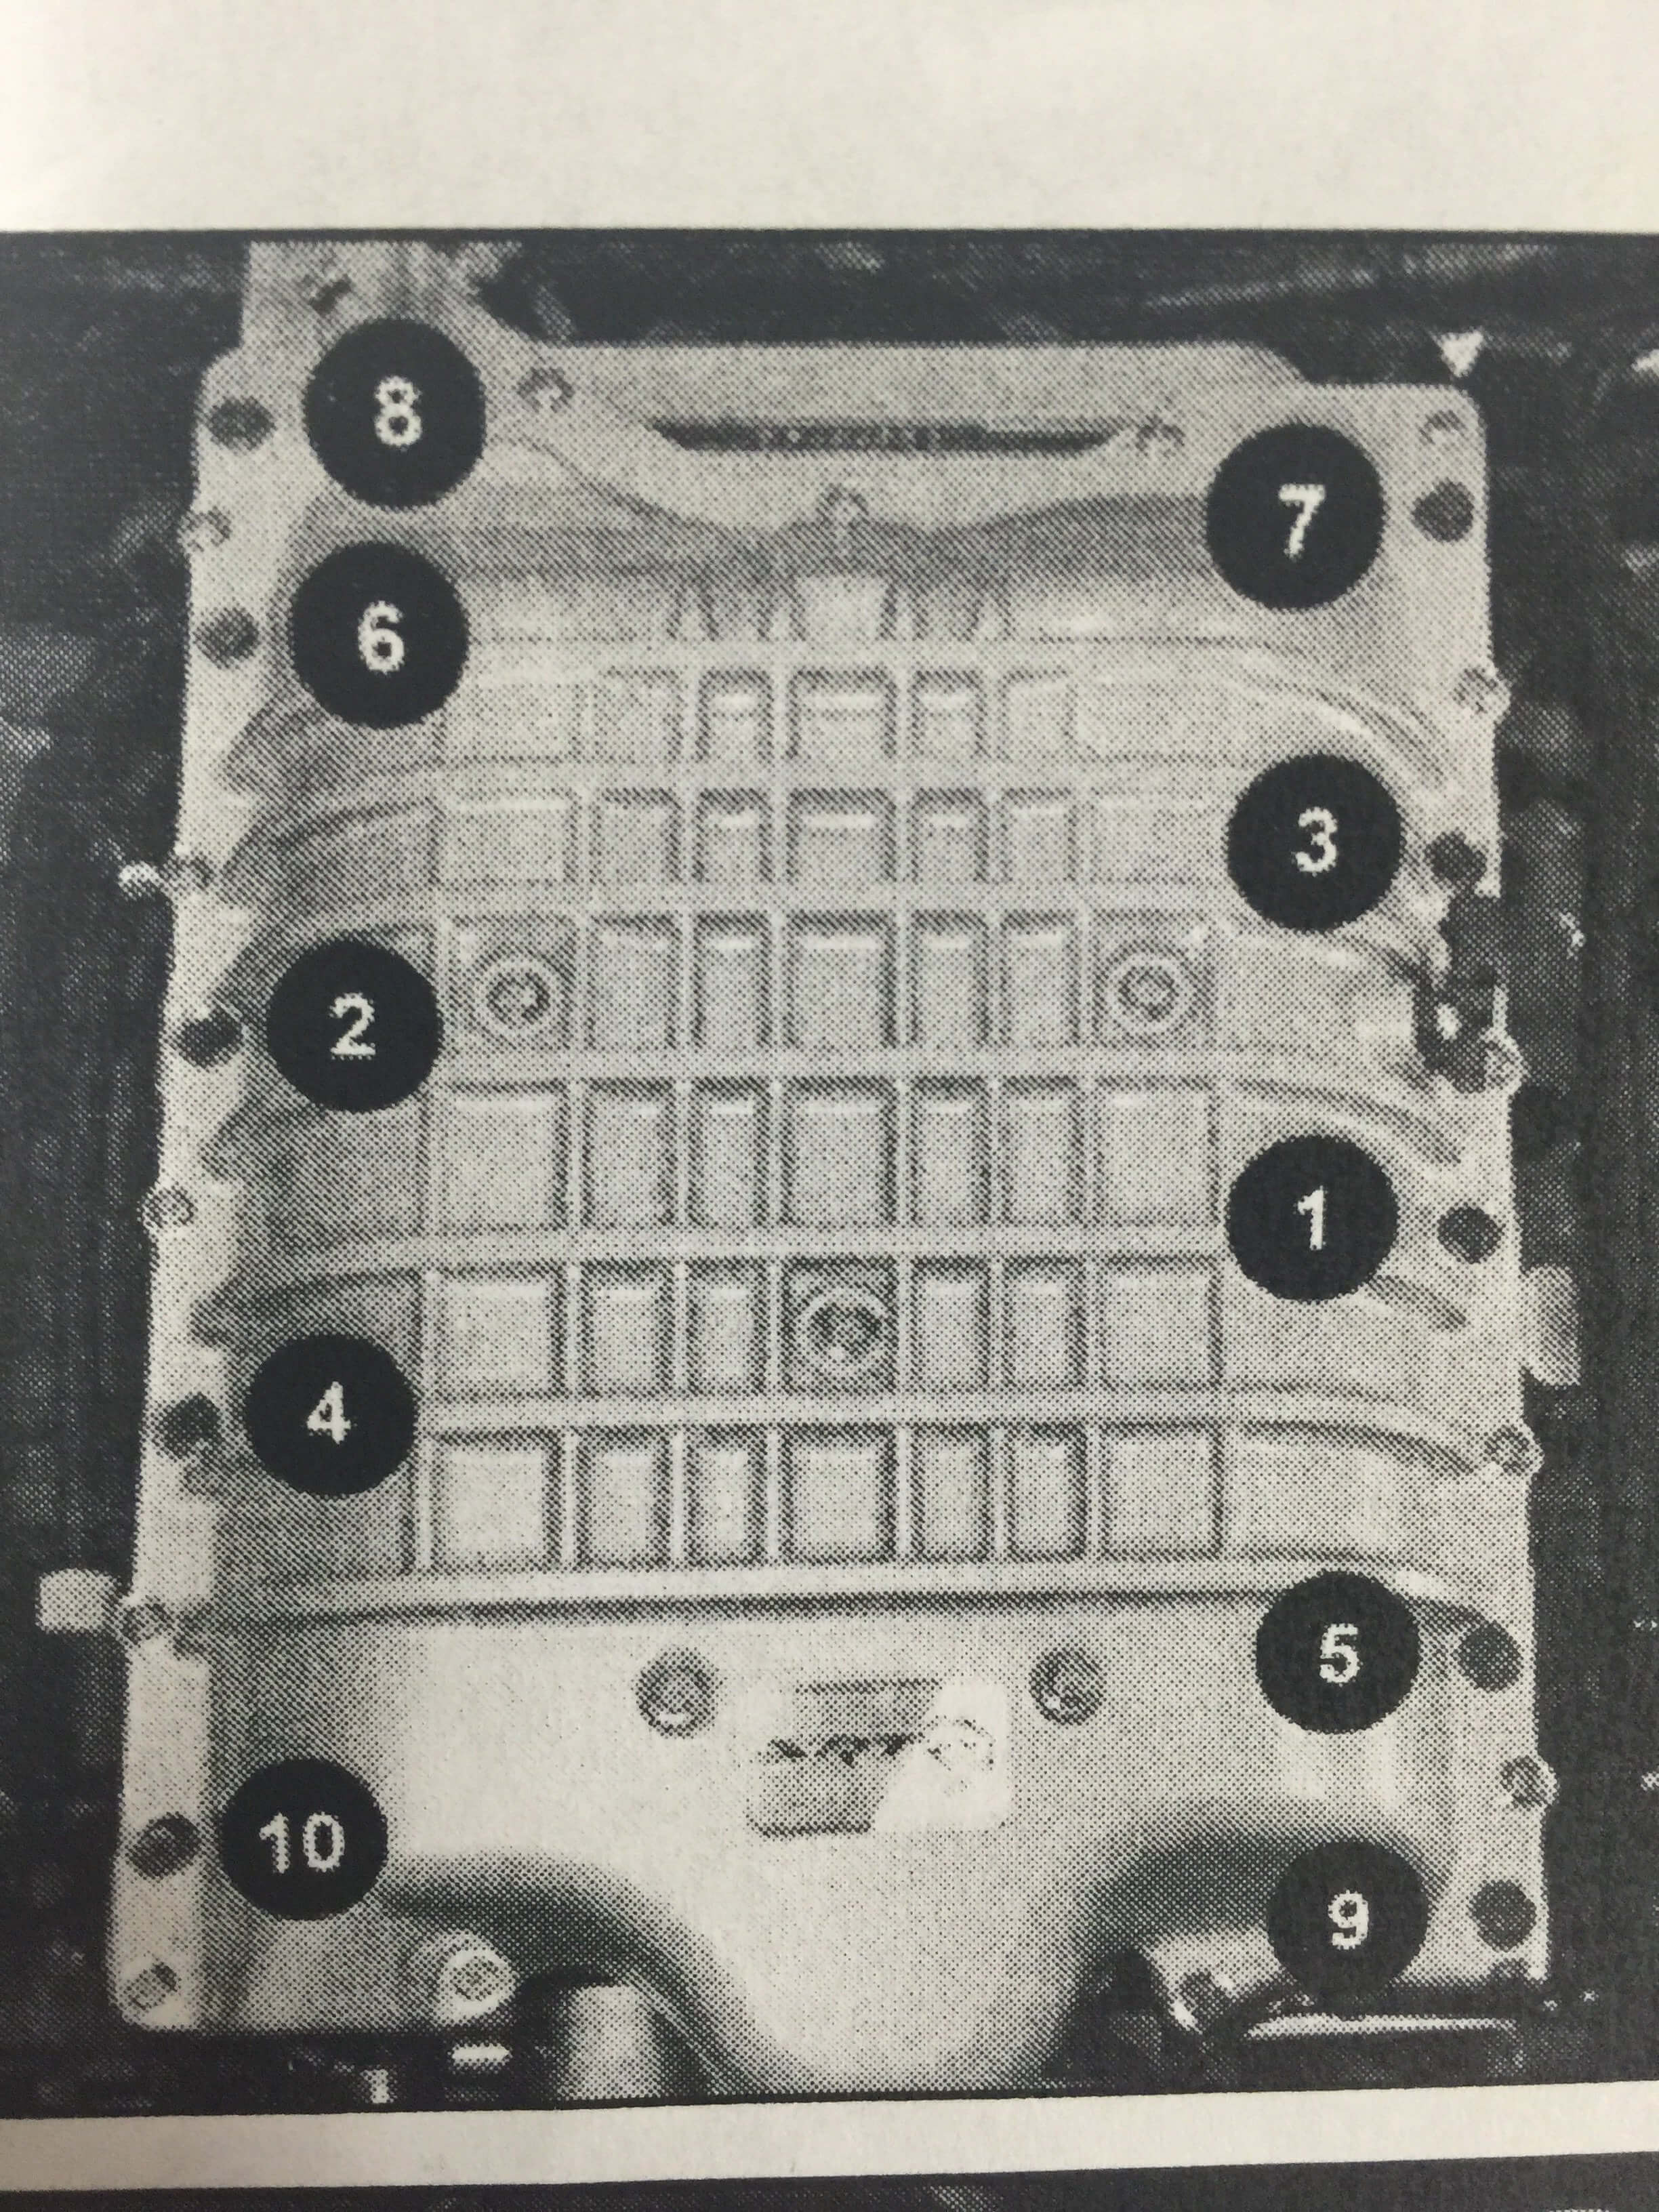
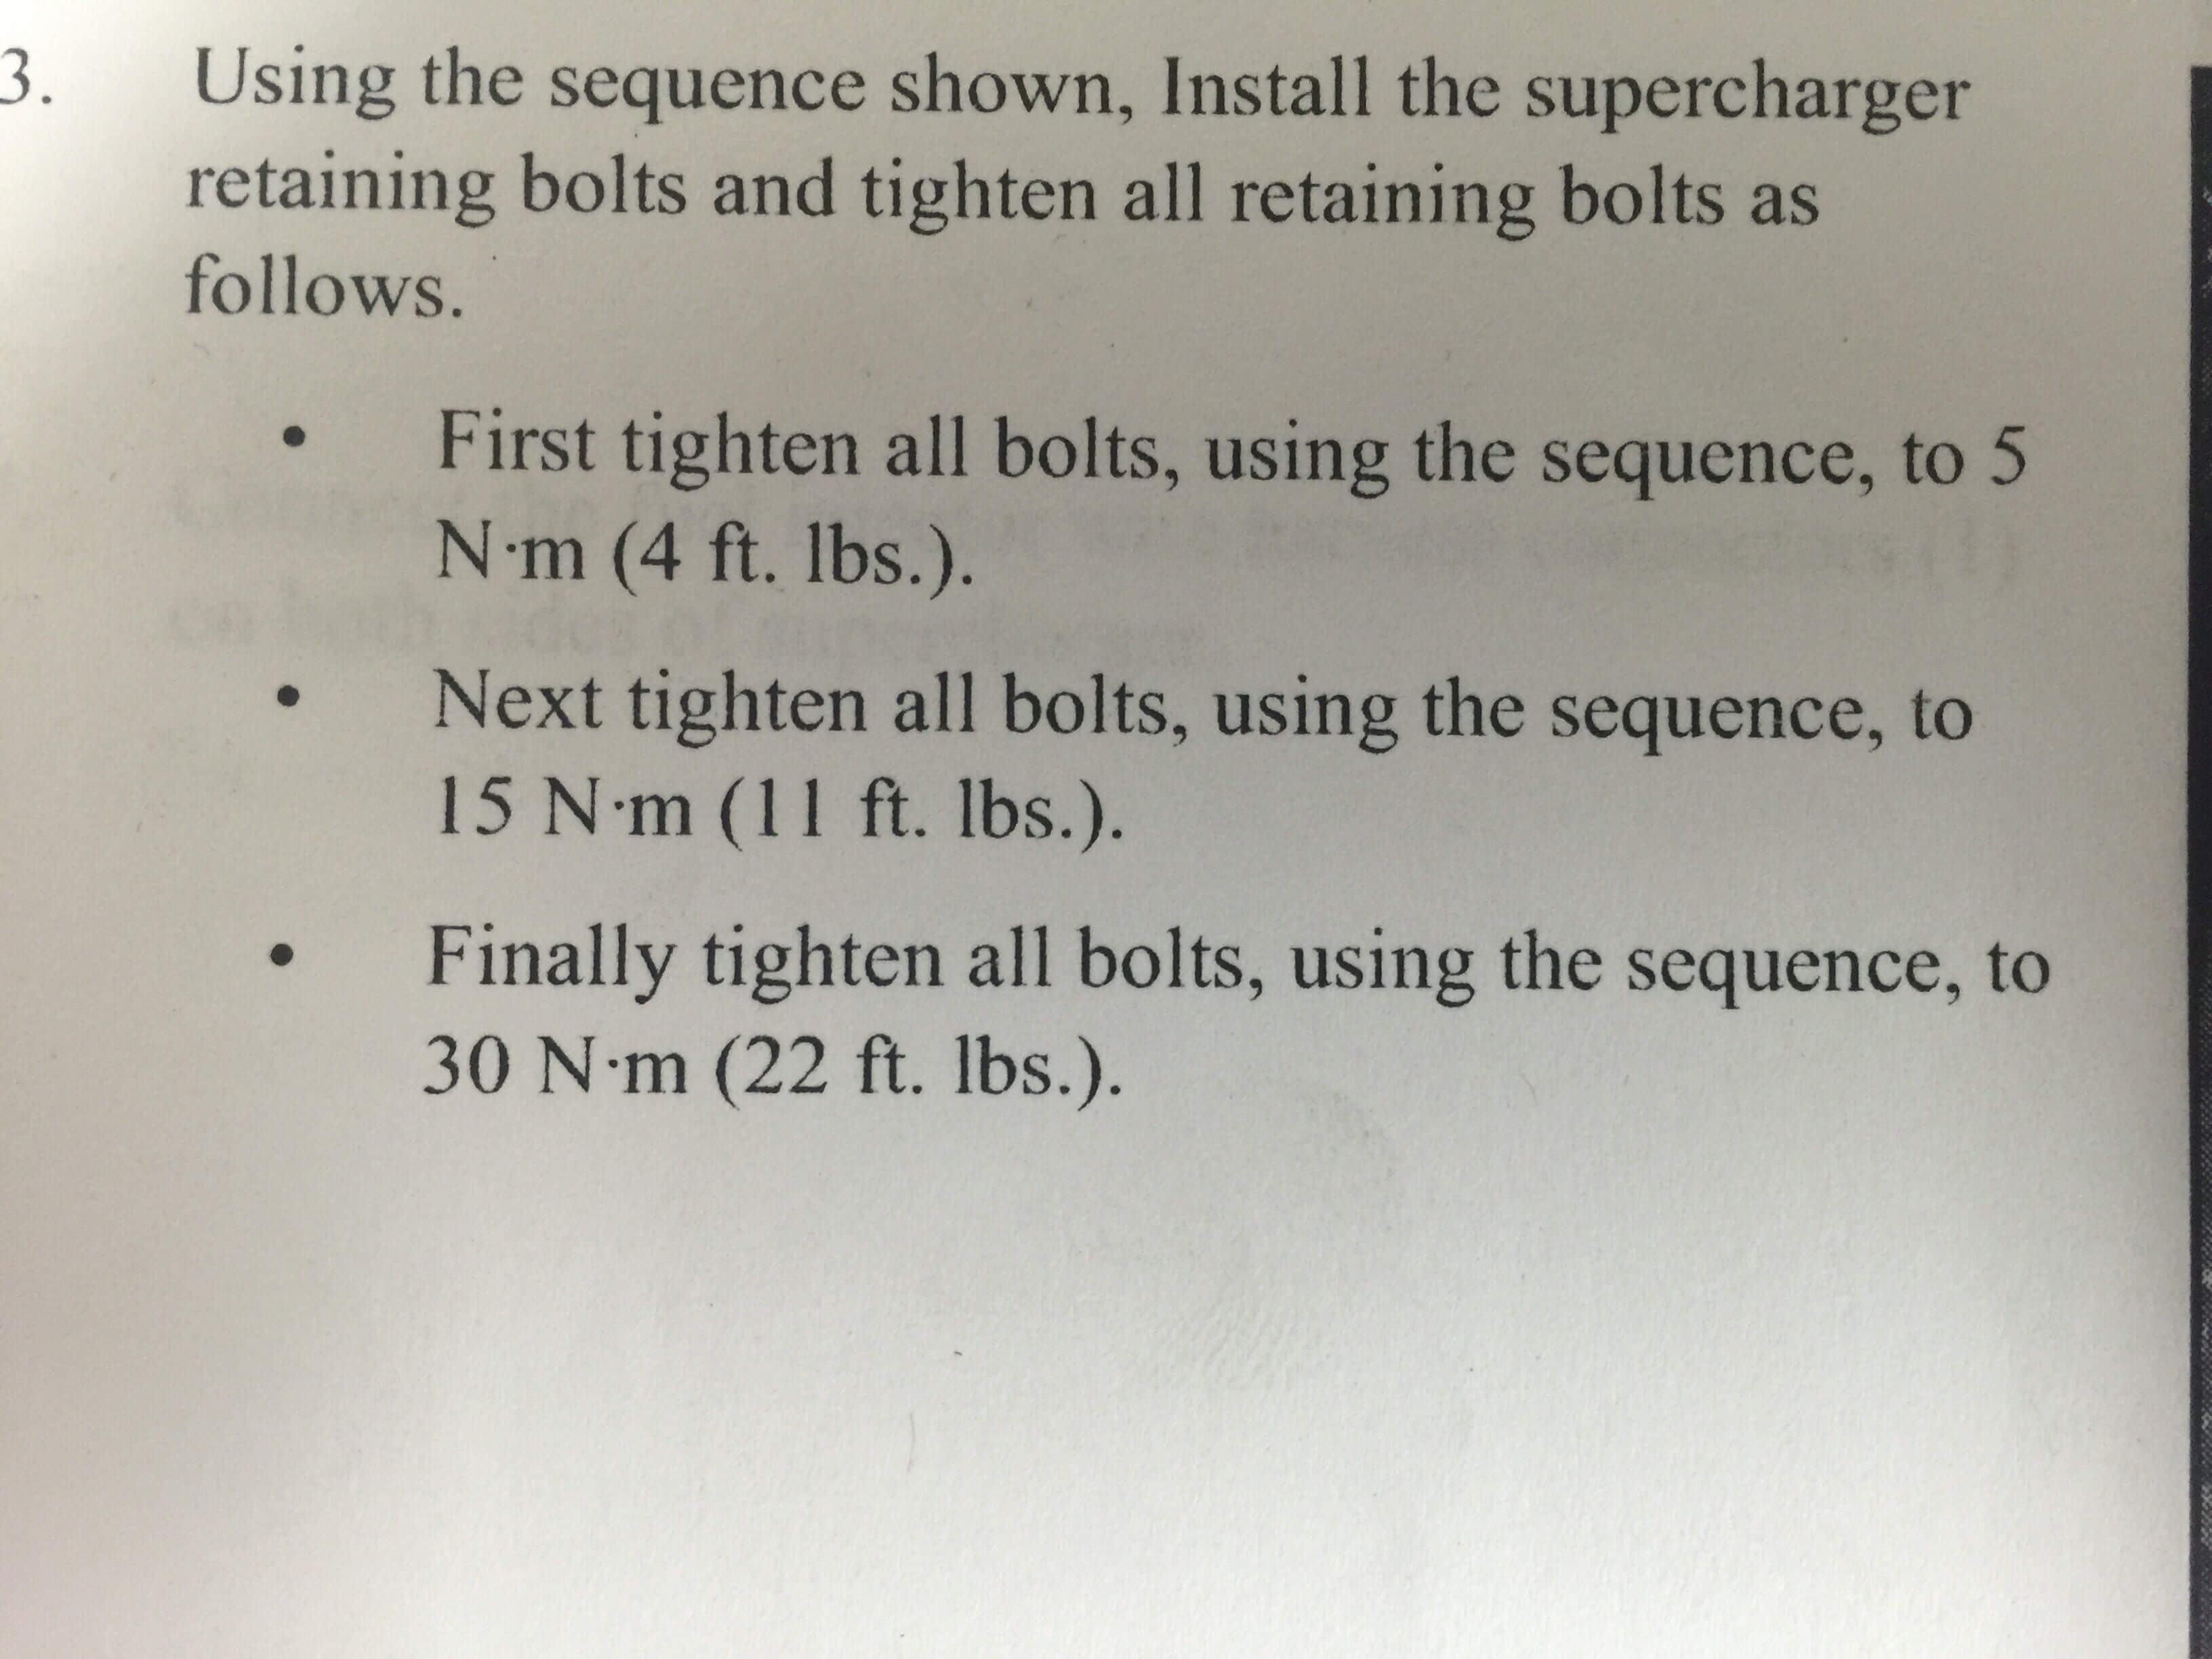
13. Install snout. Spin pulley lining up the 6 dowel pins into the holes, torque pattern to
26ft. lbs.
14. Install bypass valve grommet.
15. At this point, either install your supercharger back into the car or lower the
Supercharger onto the 2 front dowel guides on each front corner. Ensure there is no
debris in the gasket area and the gasket has not moved. Remove the props and drop
slowly.
16. Wiggle all retainer and lid bolts in by hand to ensure properly lined up gasket, then
hand tighten, then torque to pattern. Supercharger retainer (22ft.lbs). Lid bolts (7ft.lbs)


17. Install air intake, reconnect all the connectors.
18. Install the Supercharger belt onto pulley.
19. Re-connect battery
20. Start up the car, makes sure everything is aligned correctly and operational.
21. Install the wiper bracket, cowl, and then wipers. They will line up along the factory
white markers on your windshield then bolt on.
Check out our stages Hellcat packages below!
https://idspeedshop.com/dodge-charger-hellcat-id-s...
https://idspeedshop.com/jeep-grandcherokee-trackha...
https://idspeedshop.com/ram-trx-id-stage-1/
https://idspeedshop.com/dodge-durango-hellcat-id-stage-1/